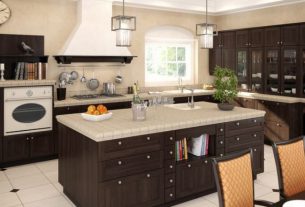
The job of painting a kitchen cabinet is not a scary task. Through it involves a certain amount of preparation, it is a DIY process. Below are the guidelines suggested to paint the kitchen cabinet and the laminate in a more organized and professional way.
Preparation and Painting of Kitchen Cabinets
- Using painter’s tape and plastic wrap sheet, cover the countertop
- Cabinets are prepared by scrubbing them using grease-cutting cleaner and a sponge scrub
- Make labelling in the inside of every cabinet to easily replace the cabinets at their respective places after painting
- The cabinet hardware is taken out by removing the hinges first
- Post the removal of the hinge, the shelves are removed, and the inside of the cabinet is cleaned.
- Every cabinet door is attached with cup hooks for easy drying post painting.
- A sawhorse is used to lay the cabinet doors, and the primer applied to the back of the door. The door is turned over, and then the front is coated. As the door is drying, the shelves and the box of the cabinet are primed.
- Using a sander with a random-orbit and sandpaper that has a medium-grit, the brush strokes are evened out smooth.
- With the aid of a newer paintbrush, the priming process is repeated using an enamel paint for the cabinet in the same order as the initial coat of priming.
- Until it is thoroughly and evenly covered the priming process is repeated and left to cure for a minimum of two days.
- Finally, the cabinet is put together and reinstalled in the same place using newer hardware.
Painting the Laminate of the Kitchen Cabinet
- Similar to that of painting the cabinet, the primary step is to cover the countertop and the backsplash using wrapping sheets and painter’s tape.
- The screws and hardware removed along with the cabinet, taken out and scrubbed using the grease-cutting cleaner and a sponge scrub.
- Labelling is done inside the cabinets to make the process of putting it back together effortless before reinstallation of the cabinet after painting.
- Shelves get removed from its positions, and the insides of the cabinet get wiped out.
- Cup hooks used to hang each cabinet door allow the doors to dry afterwards with ease.
- Using a sawhorse, the laid out cabinet doors get sanded and sandpapered in a similar way to the one used to smoothen the cabinet doors after priming used to smoothen the surface of the front and back door.
- Prime the cabinet doors in the order of painting the back, then the front, followed by the shelves and box while the doors are drying.
- They are hung in the cup hooks to dry and sanded to smoothen out the strokes.
- Using the paintbrush specially used for laminate is used to complete the priming process until an even surface with proper coverage gets achieved.
- It requires to be cured for two days to the least and then they are put together and reinstalled.