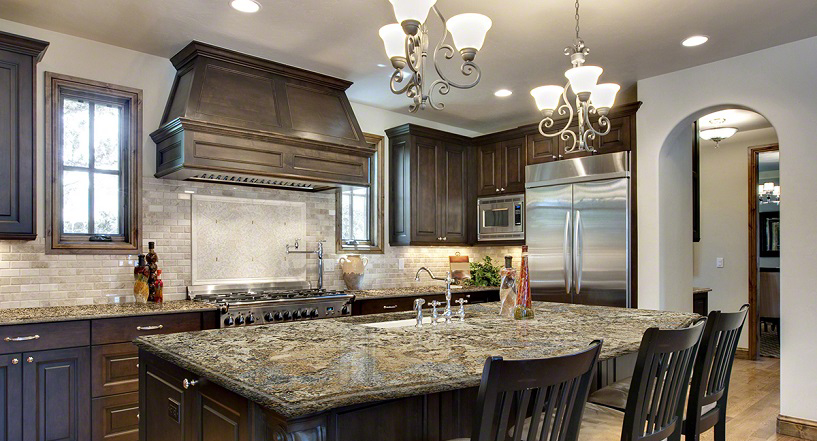
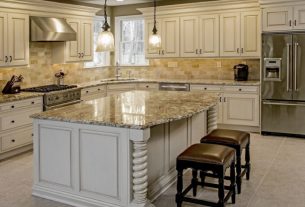
The heart of any home is the kitchen. It is where the food is cooked that fills the stomach and the soul. An old dingy kitchen or a dirty, sagging one is not the right core for any abode. So, how does one go about giving a new look to the kitchen without investing a massive chunk of money in it? We are not recommending gutting the entire thing and then rebuilding it. We are advising on a more straightforward and much cheaper project – Kitchen Cabinet Refacing.
While rebuilding the cabinets might cost you anything over fifteen thousand bucks, refacing them can go as low as five thousand. The best part is that adding new doors to cabinets and replacing the veneer can give a fantastic facelift to the kitchen. An aging space gets a brand new look with a reface. Doors and surfaces for kitchen cabinets can be bought in any woodworking store. If you want an even more straightforward DIY, then purchase peel and stick veneers.
What Is Refacing Cabinets?
To reface a cabinet is to remove the old veneer and add a new one that matches the new doors. Every exposed part of the closet is pasted with a veneer that has the same colour and texture as the new cabinet doors.
On What Kitchen Cabinets Can It Be Done?
Refacing is done best in cabinets that have a visible face frame and doors with a partial overlay. This doesn’t mean that cabinets that lack a face frame and have full-overlay doors cannot be refaced. It can be done, but the task becomes harder. The same applies to flush-inset doors where the doors and the face frame are at the same level.
Some Key Points To Remember
• Always ensure that the new doors you order are of the same size as the old one. Measuring the cabinet openings and then increasing an inch for the overlap is one way to measure the door size. But it might not be precise. Therefore, measure the previous doors too.
• If you are using self-sticking veneer, refacing is simpler because one doesn’t have to tackle contact cement. But one has to be extremely cautious while applying the veneer as the adhesive is strong. Once stuck, adjusting the surface can be hard to remove and replace. The best technique is to measure precisely, cut accurately and then place the veneer strip on the cabinet face.
• A tip is to measure twice so that you just have to cut once. Work very carefully if you are doing the project alone.
• Trimming the extra parts from the veneer is no easy task. To do so use a very sharp utility knife after the adhesive on the self-stick veneer has dried. Cut in sections. Go slowly while keeping a hand braced on the surface of the cabinet at all times. It will keep the knife steady and give your cut more power.
We ensure you that once you are done with refacing the kitchen cabinet; they will look like entirely new cabinets have been installed.